
 Intune is the one MDM AgenShield connects to directly. Connect your Microsoft
Entra tenant once, and every campaign afterwards deploys from the Frontegg Portal:
no downloading profiles, no uploading packages, no keeping two systems in
sync by hand.
Intune is the one MDM AgenShield connects to directly. Connect your Microsoft
Entra tenant once, and every campaign afterwards deploys from the Frontegg Portal:
no downloading profiles, no uploading packages, no keeping two systems in
sync by hand.
Connected (recommended)
Register one Entra app. AgenShield creates the group, the profile, the installer app, and the offboarding script for you — and can repair them if they drift.
Manual upload
Download the campaign’s profile and package and push them yourself. Fully supported, no tenant connection.
Connected integration
You do four things once — register an app, hand over two IDs, upload a certificate, grant permissions — and from then on every campaign deploys with one click from the Frontegg Portal.What AgenShield does on your behalf
Once connected, pushing a campaign creates and maintains these objects in your tenant:
Your side of the deal is one thing: put devices or users in the group. You
can do that from the Frontegg Portal or from Intune — both work.
The connected push deploys the all-in-one profile and the package — the
same two objects it has always created. To push things yourself instead, use
Manual upload.Mixing the two is what to avoid, and the rule is per device: one profile and
one installer. Never both profiles (they carry the same payloads, and a
duplicate network-filter payload resolves unpredictably), and never both the
package and the install command.The pairing is not free in both directions. The install command works with
either profile, because it carries the enrollment token itself. The package
requires
agenshield.mobileconfig: it has no other way to receive a token, and
deployment.mobileconfig does not carry one — see
Choosing a profile.Connect your tenant
Settings → Integrations → Connect Microsoft Intune. The wizard has four steps and takes about five minutes. AgenShield authenticates with a certificate it generates — you never create, paste, or rotate a client secret.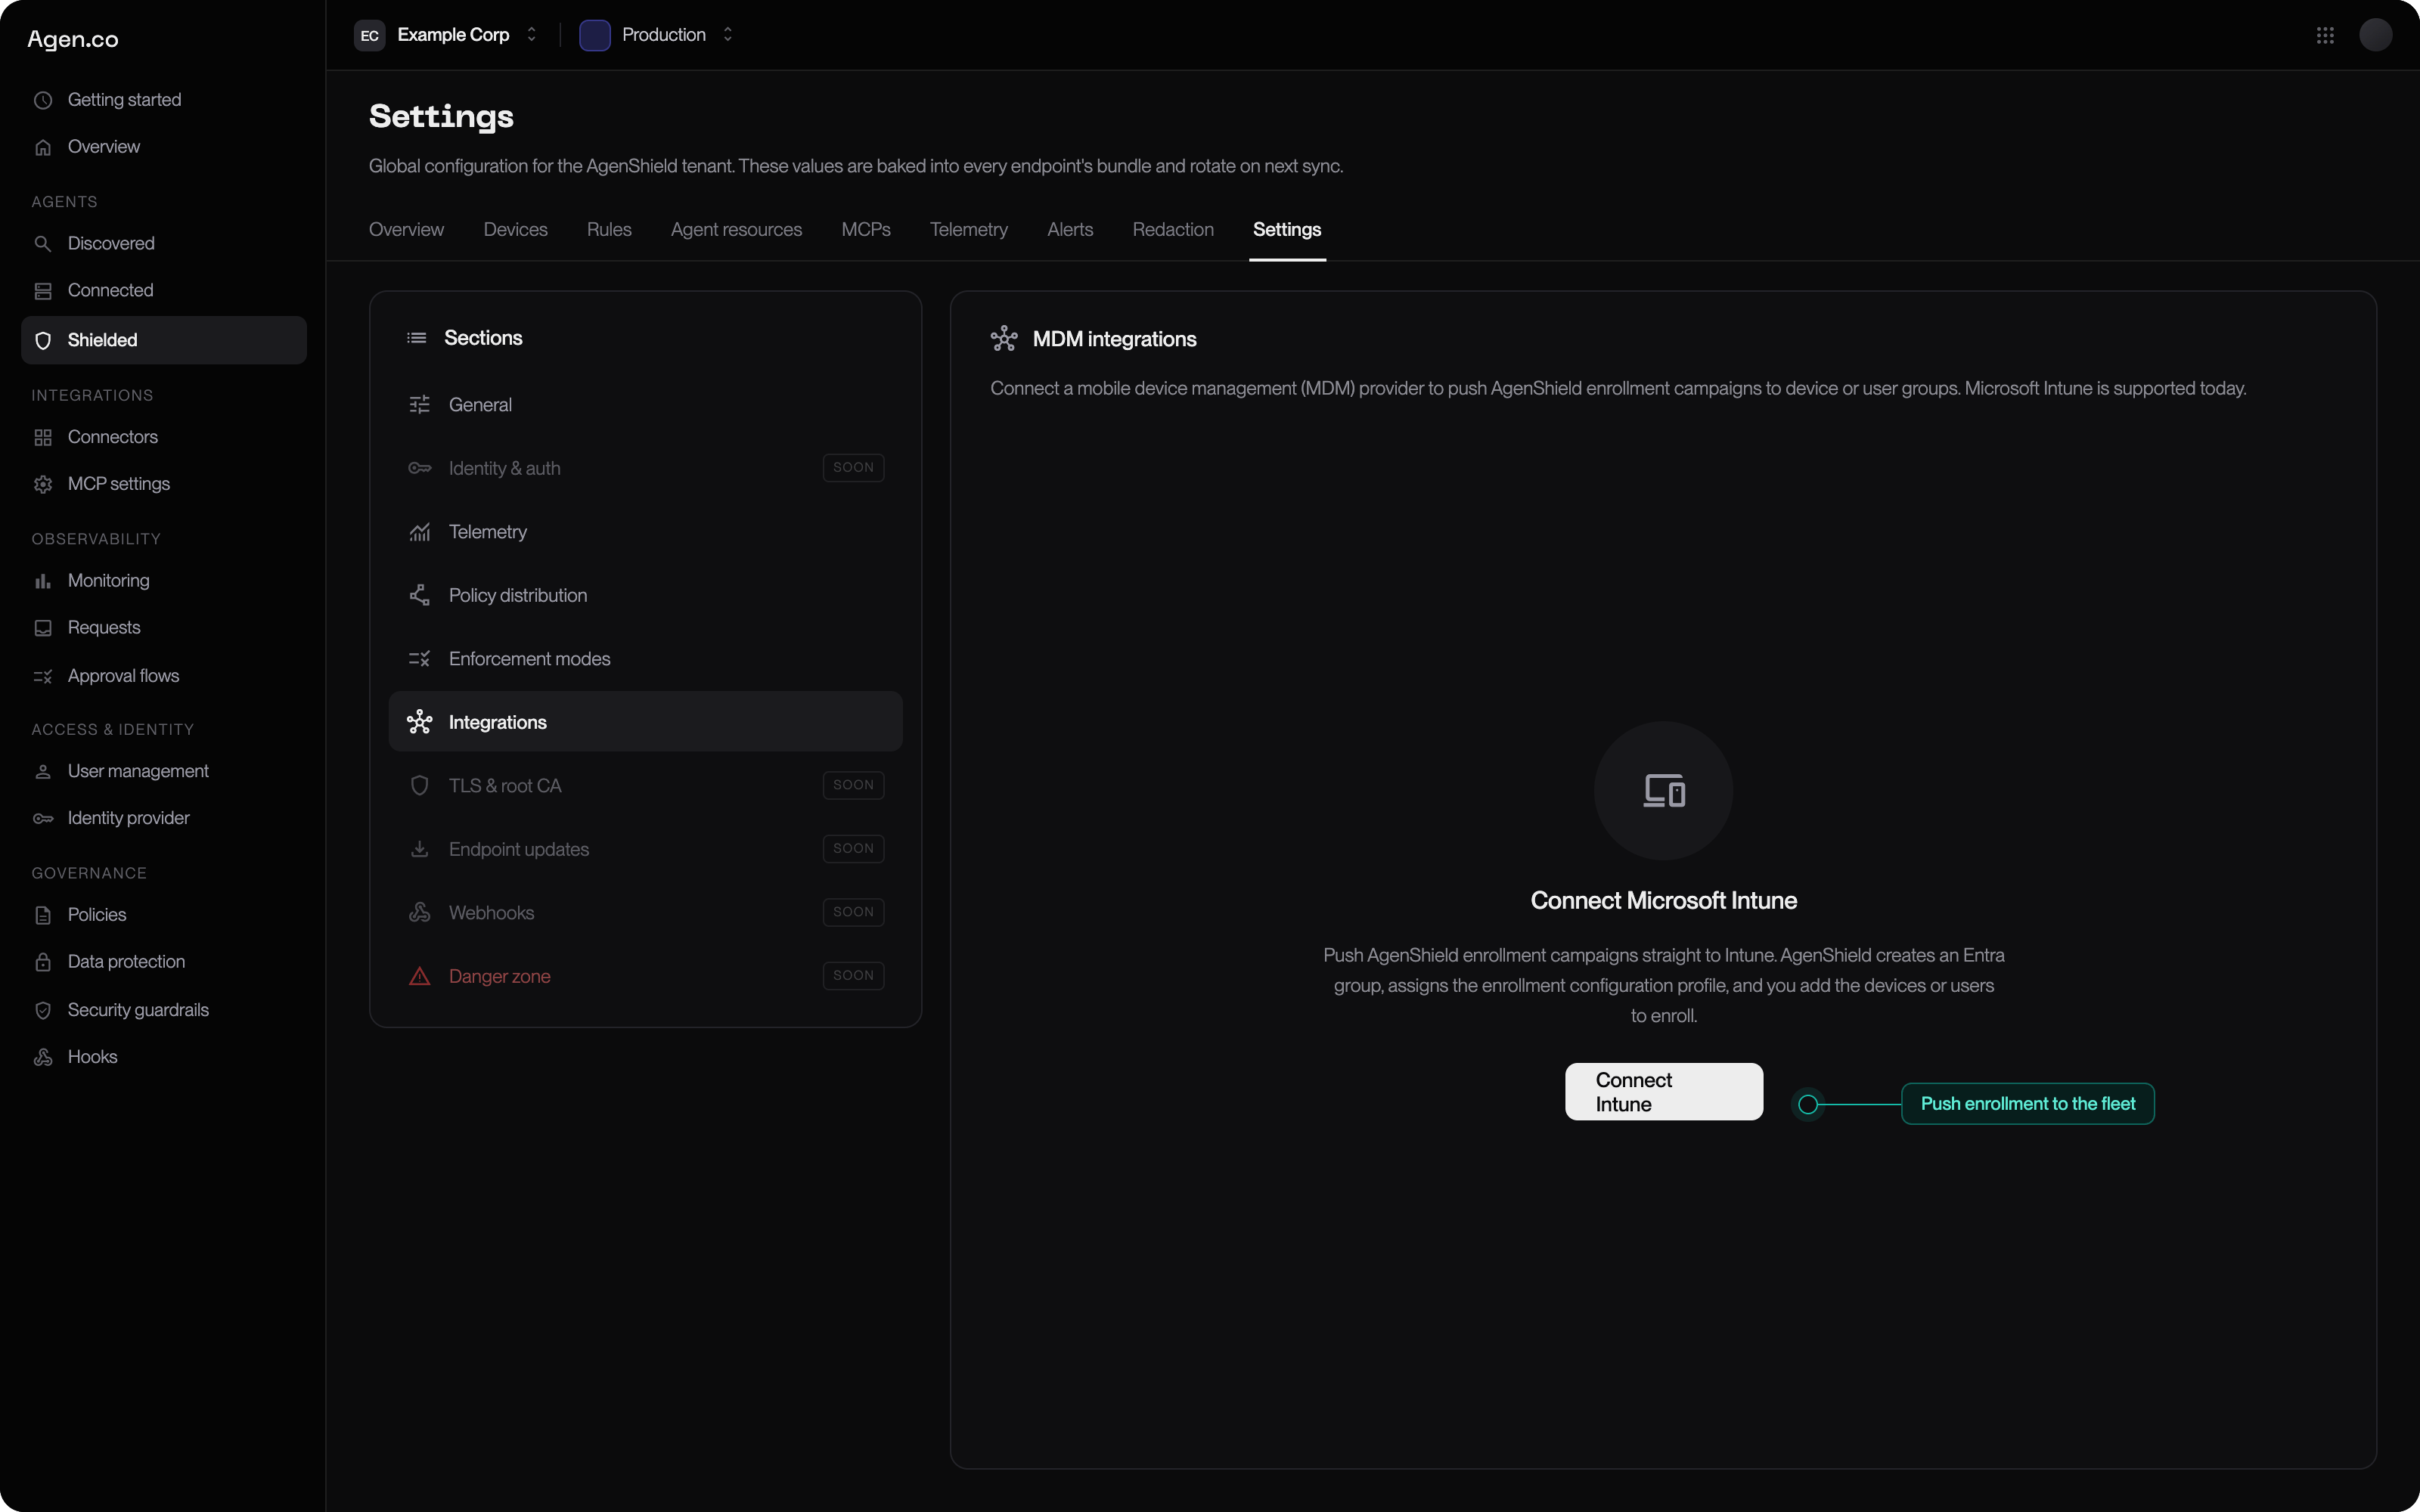
Settings → Integrations — where the connection starts and where its health is reported afterwards.
1. Register an app in Entra
In the Entra admin center: Entra ID → App registrations → New registration.- Name it something recognisable, e.g.
AgenShield. - Keep the default account type — your organization only.
- Skip the redirect URI. It is not used.
- Select Register.
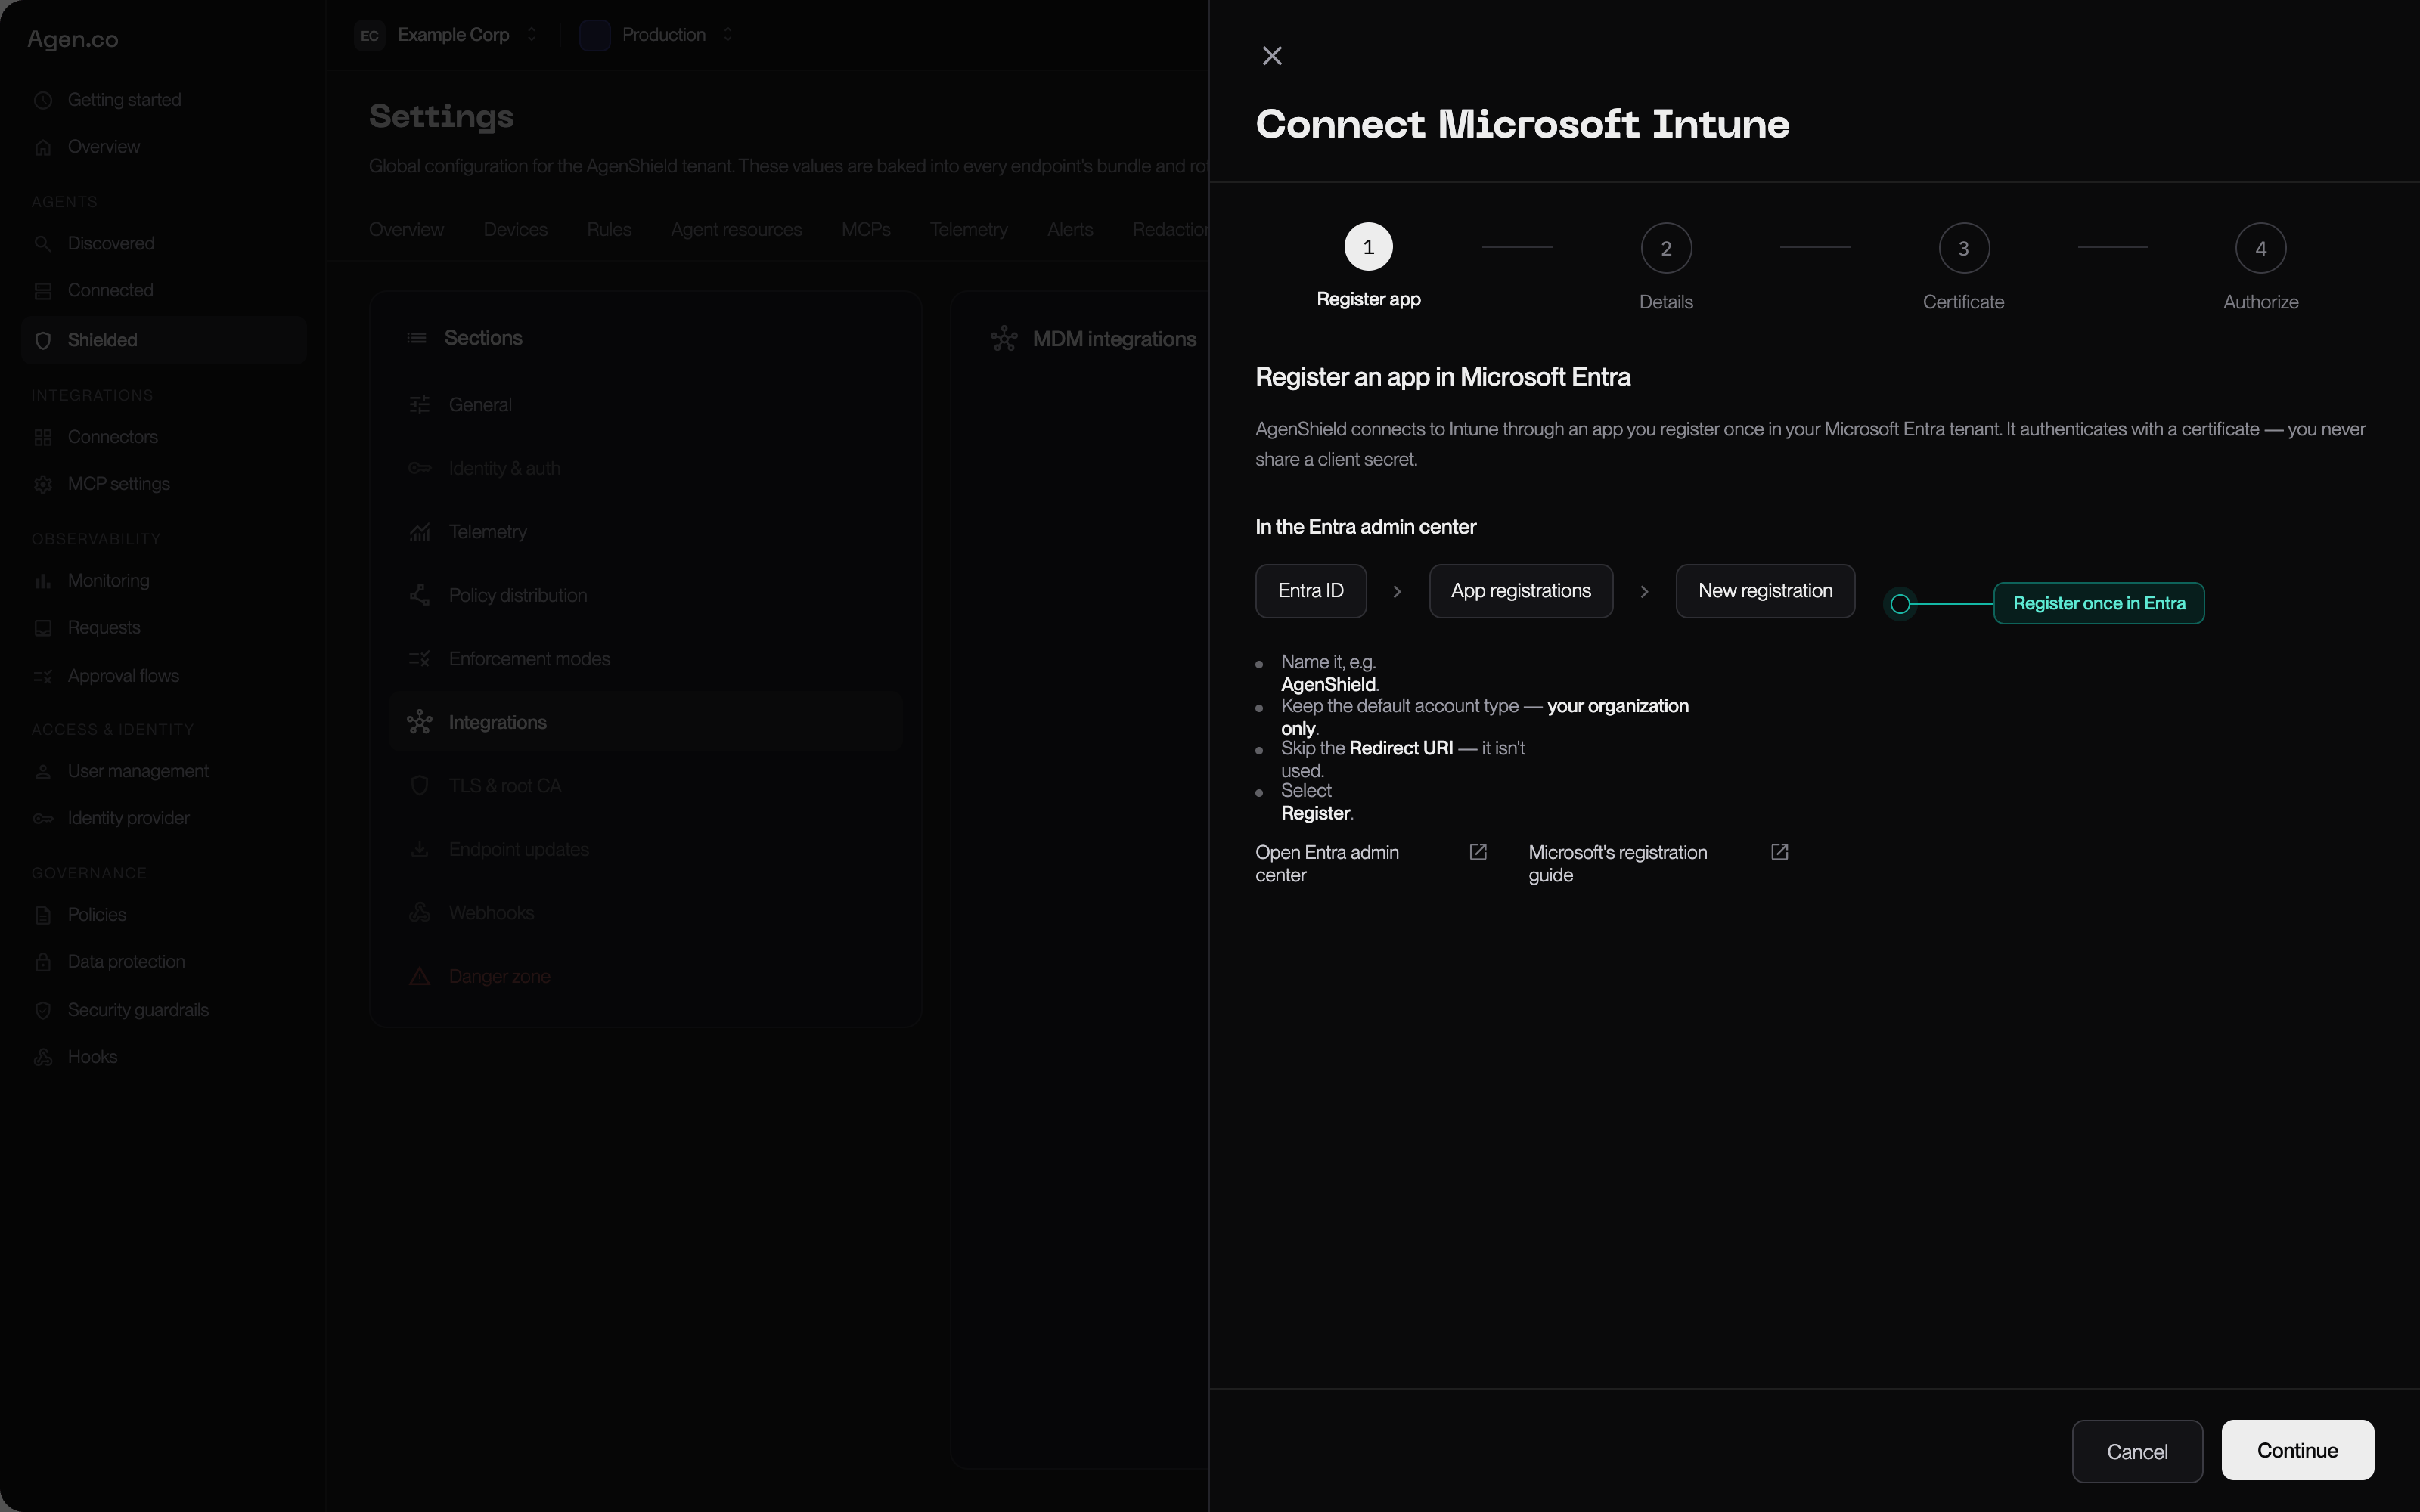
The wizard mirrors the Entra steps as you go — register once, then hand the two IDs back.
2. Give AgenShield the app’s identifiers
Back in the wizard, enter a name for the connection plus the two GUIDs from your new app registration’s overview page:3. Upload the certificate
AgenShield generates a keypair, keeps the private key encrypted, and hands you the public half. Download it, then in your app registration go to Certificates & secrets → Certificates → Upload certificate and add the file. The wizard shows the SHA-1 thumbprint Entra will display after upload — compare the two to confirm you uploaded the right file to the right app.4. Add permissions and grant consent
API permissions → Add a permission → Microsoft Graph → Application permissions. Required. The connection test probes each of these individually, so a failure tells you exactly which one is missing.Optional permissions — three Frontegg Portal conveniences, each addable later
Optional permissions — three Frontegg Portal conveniences, each addable later
Each unlocks one specific feature and nothing else. To add one later, append
the permission and re-run Grant admin consent — no reconnection needed.
Push a campaign
From Devices (on the campaign) or Settings → Integrations, choose Push to Intune:- Pick the campaign.
- Name the group — e.g.
AgenShield — Engineering Macs. - Choose whether members will be devices or users.
Membership changes take a few minutes to reach devices. That is Intune’s
check-in cadence, not AgenShield.
One device, one campaign
A device or user may belong to only one AgenShield campaign group per connection. If you try to add one that is already in another campaign’s group, the whole request is refused and the conflicts are listed — moving a device between campaigns is a decision, not a side effect. Confirm, and AgenShield removes it from the other group first.Track the rollout
WithDeviceManagementManagedDevices.Read.All granted, the push view joins your
group membership against Intune’s device inventory and against the Macs that
actually enrolled:
It also lists enrolled devices that are not in the group — usually machines
that were installed by script before the MDM push existed.
Offboard a device
Use Offboard, not “remove from group”. Offboarding does both halves: it removes the member from the campaign group and adds it to the connection’s uninstall group, whose assigned script removes AgenShield at the next check-in. Re-onboarding later pulls it back out of the uninstall group automatically, so no device ever sits in both.Keep it healthy
Two maintenance actions, both in Settings → Integrations:
If someone edits or deletes an AgenShield object in Intune or Entra, Check
setup reports it and Repair converges it back.
Publishing a new release: the installer app is published once per connection
and shared by every campaign group. After a new AgenShield release, re-publish
it from the connection — every campaign picks up the new version without being
re-pushed.
Manual upload
No tenant connection, no app registration. Push the two objects yourself.1. The configuration profile
- Devices → Manage devices → Configuration → Create → New policy.
- Platform macOS, profile type Templates → Custom.
- Name it, e.g.
AgenShield, and uploaddeployment.mobileconfig. - Deployment channel: Device channel.
- Assign it to your target device group.
2. The install command
- Devices → macOS → Shell scripts → Add.
-
Upload a script containing the campaign’s install command:
- Run script as signed-in user: No.
- Assign it to the same device group.
Give the first run time. Shell scripts are not delivered over the same
channel as profiles. They are run by the Intune management agent, which is
installed the first time you assign a script to a device, and which then checks
in on its own schedule — up to 8 hours, independently of the device’s MDM
check-in. Until that first agent check-in the script reports no status at all,
which looks like nothing happening.The Sync device action refreshes MDM only; it does not pull scripts. To
make a test device check in now, open Company Portal on it, select the
device, and choose Check status. If a script has still not run after a day
of the Mac being awake and online, see
The install script never runs.
Choosing a profile
Both campaign profiles carry the macOS approvals. They differ only in whether they also carry the enrollment token, and that difference decides which installers each can be paired with.
So: the install command pairs with either profile, and the package pairs only
with
agenshield.mobileconfig. Pairing the all-in-one profile with the install
command is fine and slightly belt-and-braces: the command’s token is used, and
the profile’s is the fallback if the command has not run yet. Pairing the
package with deployment.mobileconfig is the one combination that does not
work — the Mac gets every approval and never enrolls. What you must not do is
deploy both profiles, or both installers, to the same Mac.
If your tenant uses Multi-Admin Approval, the profile and the script may sit in
pending approval before they deploy.
Next
Enrolled devices
Reading fleet health once devices land.
MDM enrollment reference
What each profile payload does, and how to verify a device.